Sunday, June 2, 2019

Expanding the French Revolution Project, Part 2


As described in Part 1 and in Ross's blog, we have decided to work on the French Revolution, with the intention of putting the combined results on the table at Huzzah next year (15-17 May 2020) in Portland, Maine.  The target rules are A Gentleman's War (AGW), which gives us a basic structure of 12 man infantry units, 6 man cavalry units, and cannons manned by about four crewmen to work toward.  For a two-player game, the rules recommend using 6-9 units for a "small" army.  Based on our combined decades of convention gamemastering, we would anticipate that players will have "enough" to do if they are each commanding 3-5 units in a multiplayer game, especially if we are generous with the cameo roles and use the distinctions rules.  Six players seems a solid goal for Huzzah, and that translates into 18-30 units, of which we currently have five.  It would seems that we have our work cut out for us...

My own initial goal is to get to two cavalry units (have 2 of 4), four infantry units (have 3 of 8), and a gun for each side (have 0 of 2), so that I can put a game on the table at home for inspiration.  That would be 14 of the 18-30 we would want for Huzzah.

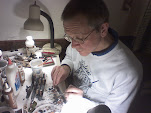
Having done these calculations, the weather last Monday, on Memorial Day, was beautiful.  My son Norman and I played out the AGW game previously reported, and he headed home.  I took my casting gear outside and prepared to add some reinforcements.  Apart from a test session with these molds a couple of weeks ago, it's been quite a few years since the Meisterzinn multi-part molds in my collection have been in serious use.

Setting up outdoors
Years of experience with casting has taught me that there are variables over which I have no control, so that on days when certain molds are working well, I make extras, because there is no guarantee that things will work again the next time. 

Results of casting session 
I spent three or four hours casting, cycling through three or four molds at a time, enough to allow the casting to solidify before opening the mold, but not so many that the molds got "cold" (it's all relative when you're pouring metal at 600+ degrees Fahrenheit).  The walking/trotting horse from mold 1322 was having a good day.  I was getting a better than 90% success rate on pours, so I made about 20 of them.  The galloping horse from mold 1325 almost never works.  I tried six or seven times and didn't get close to a complete casting.  This is why every horse already done for this project is a 1322, and it looks likely that every new horse will be too.  I wasn't sure what cavalry I would be making, and a have a handful of the hussar bodies already around, so I only cast three hussars and seven cuirassiers.  They also generally cast easily, so getting more later should not be a problem.

Mold 1324 makes an advancing infantryman and a standard bearer.  Past experience is that both of these figures cast fairly reliably.  Unfortunately, one doesn't need that many standard bearers, and the hands are in a position opposite that of a right-handed shooter holding up his musket.  I have occasionally filled out a unit by sticking one in anyway, but more often I have used this casting as a figure loading.  If you put a section of fine wire in the right hand as a ramrod and a musket with the butt on the ground in the left, he's passable.  However, I didn't plan on doing that so I only poured that mold cavity a couple of times.  The advancing figure (as I'll show below) was working well, and I was able to make 21 of them, with a solid 90+% success rate.  

The other molds were more troublesome.  I lost track of how many times I tried the firing poses mold (1329), but I got 6 usable figures (three of each), none with bayonets cast, after at least a dozen attempts, so a success rate of of under 25%.  I ended up with 4 good examples of the marching infantryman from mold 1321 after at least eight tries, and they were mostly from the first few tries, so I set it aside for another day.  I tried 1326, the civilians, and got a couple of women, but the man wouldn't cast.  The bandsman, 1332, as usual, would not cast at all, although I got more cocked hat heads, as used for the British below. 1328, an officer with cast in lapel detail (so of a later style than the officer in 1321) was working, so I made 3 of those.  

Overall, I ended up with horses for three new cavalry units, or a little more if the existing 8-man units are expanded to 2 6-man units, two uniform pose advancing infantry units, and enough assorted castings to staff a third unit, which brings up an artistic/aesthetic question, to be discussed below.

On Friday, a day I had off from work, I sat down and started to assemble pieces.  I have a cache of fifers from years past, and the fifer mold (1323) at least used to cast fairly reliably.  So I decided that the first unit up would extend the available bodies a bit by consisting of 12 men, including an officer, a flag, and a fifer.  A drummer would be better, of course, but Meisterzinn does not have a drummer with a normal military drum--even the bandsman, if one could get it to cast, comes with a choice of a snare drum or a bass drum.

Here is a 1792 infantryman from Vol. 1 of the Funcken Lace Wars book. After discussions with Ross, I concluded that the best match for the transitional cocked hat from the available Meisterzinn heads was one that is included only in the bandsman mold.


With as many figures as we are proposing to add, it is going to be necessary to keep the piece-by-piece conversions down to a minimum, so the goal is to be "recognizably close" to the historical figures.  So, sometime in the 1780s the British went from gaiters reaching above the knee to gaiters below the knee.  I am not attempting the file the castings to reflect this.

First British under construction
By Friday evening I had the whole unit assembled.  I glued them to craft sticks (aka tongue depressors) for ease of handling.

A unit ready to prime
I got up yesterday morning and primed them with a black spray primer.  I considered using white, given the British colors, but I appear to be out of white primer at the moment, and I didn't want to go out in search of more at 0600.  I would expect that I would have started by running a black ink into crevice and shadow areas, but that experiment will need to wait until later. 

After spraying the primer from six directions and giving it time to dry, I started in on painting.  I am more or less attempting to match the style I used on the existing figures.  After putting one a coat or two of the basic colors, I took one infantryman and finished him up.

Sample infantryman

Sample infantryman, back

I used the distinction colors and a simplified version of the button lace pattern from the 37th infantry regiment, one of the ones deployed for the Flanders campaign.  

The state of the rest of the unit when I quit for the day
Today my plan is to see if I can finish the rest of the unit (minus the actual flag, most likely), but if the weather is good, I might see about more casting.  The next unit up is probably going to be some approximation of British light dragoons, for which I believe I have the parts already cast.  At that point, the Coalition will be ahead in strength, so I would hope to alternate between Coalition units and French units.

If the casting success rates remain constant (not usually a good assumption), I am eventually going to have to deal with the aesthetic question of how uniformly posed I want the units to be.  An all-advancing unit, as shown above with the British, is likely to be fairly easy.  A firing line unit of an officer, a flag, five kneeling shooters and five standing shooters with complete bayonets is going to be nearly impossible.  The existing units, as shown in Part 1, were intended for an individual figure based skirmish game, so I wanted them to be as mixed as possible, in case it was necessary to easily identify individuals.  Going forward, I would like the French to present a more irregular appearance, and they historically used more skirmishers, so there may be French units which are half shooting/half advancing.  If the firing figures continue to be rare, though, I may reserve them for special units, jaegers or other light infantry, and it will probably be necessary to fill things out with standard bearers posed as loaders. 

By the end of the outdoor casting season in September/October, I would like to have all of the pieces and parts wanted for the Huzzah game.  


Saturday, June 1, 2019

Expanding the French Revolution Project, Part 1


The origins of my French Revolution project are now lost in obscurity.  I originally bought a set of the 40mm Nuernberger Meisterzinn molds for the purpose of adding some expansion units to Chris Palmer's French and Indian War project.  I started thinking about what else I could do with them, and realized that the different heads included covered a number of French Revolution types, and somehow the idea that a Scarlet Pimpernel-based scenario would give me another use for the molds as well as provide an excuse to put a marching band on the table in a game pushed this over the edge, from thinking to doing.  That also tied the time down to 1793-4.

My main resources for painting were the Funcken Uniforms of the French Revolution book, and the Haythornthwaite book on the same topic.

In the initial scenario development (and I have the notes around here somewhere...) the idea was that each player would have one unit, each of which would have its own separate victory conditions.  We also had a suggested set of variant victory conditions, so that we could run the game multiple times and playing previously would not be a spoiler, because the hidden information could be different each time.  What stayed the same is that the Austrians were more-or-less working together to take a military objective (a bridge), and the French national guardsmen (or Les Bleus) were tasked with defense of the objective, and a special order to capture the Scarlet Pimpernel.  One of the other five French factions (regulars, cavalry, mounted police, band, and civilians) would not be what they seemed, but would be the Pimpernel, his assistants and some French nobles attempting to escape.

Each mounted faction was built with eight figures, and each foot faction was built with twelve.  We ended up with a few extra civilians as well.  As always, Ross Macfarlane decided to pitch in and help with the painting (and more, as will be shown).  

Ultimately, we played this a few times in 2007-8, and it got shelved with a mental note that the rules I was using needed some work, and that not all of the factions were fun to play.  It was close, but not quite there.

When I got A Gentleman's War (AGW) last month, I realized that it might be just what I was looking for to get the French Revolution back on the table, although as a small battle game rather than a skirmish.  The presence of an extended section on "cameo roles" gives something to do with civilians, bandsmen, and the Pimpernel.  I discussed the idea with Ross, who was very enthusiastic, and recommended a couple of sources on the 1793/4 campaigns in Flanders.  

Part 2 will be more about where this might be going, but here's a quick review of what there is:

First up are the Paris mounted police.  I have a feeling that finding a battlefield role for these guys may be difficult, but perhaps we can just slide them in as a French cavalry unit without drawing any particular attention to them.  I'll mention here that the mold collection has two horses, but I have only been able to regularly cast the horse that comes with cuirassier body successfully.  All of the mounted  police were built using the "hussar" body, with the cast-on lapel lace filed off.

Paris mounted police, from Funcken

Close-up of one mounted policeman
The Austrian cuirassier uses the same bicorne head as many of the French.  As "toy soldiers" I compromised and painted the backplate cast on the figure, although the Austrians historically only wore breastplates.  My general goal has been to save metal file work for when it is really needed.

Austrian Cuirassier, from Haythornthwaite

The French chasseur a cheval uses one of the two standard helmet heads included in the various molds, and the hussar body without modification.

French Chasseur a Cheval, from Funcken
The marching band turned out to be more difficult than expected.  The marching band mold has a figure with his arms extended, which would require various levels of re-posing to hold the instruments included.  He turns out to be incredibly difficult to cast, and I could barely get enough to do the drum section.  Fortunately there is a fifer mold, which casts very reliably, so the band was filled out with fifers, plus a standard bearer and a regular officer "armed" with the conductor's baton from the band mold.

French Marching Band

The French National Guards were the most fun to paint.  I did some light conversions with file work and putty to give most of them non-uniform trousers, and then painted them with patches, faded coats, and so forth. I used a mix of bicornes, some with plumes lost, both sideways and fore-and-aft, plus one bare head pulled in from the civilian mold.  As I expand, I am probably going to do a second equally ragged unit, painting a couple of figures at a time between regular units as a treat for making progress.

French Garde National
The old French regular infantry wear something close enough to one of the helmets included in the mold set that I just used them as is.

Old French regular army
The Austrians were a pain.  The Austrian casket hat from the 1793 period is not included in the molds, so I attempted to file something down from Seven Years War grenadier mitres.  As my tolerance for filing diminished, I finished them up with a couple of bare heads.

Austrian infantry
Early on, the civilians stalled me.  Chris Palmer tried a couple of civilian conversions for me, the fellow in the green coat with a spike club, from a Meisterzinn SYW officer, and the guy with the pitchfork, from a Meisterzinn 16th century halberdier.  Ross, in a burst of enthusiasm, decided to sculpt a couple of civilians and make molds, so the rest of the men are from one of those two masters with varying amounts of conversion. The women are straight out of the Meisterzinn civilian mold, with both possible heads included.  

Civilians, some rather militant
I did one of the male civilians from the Meisterzinn mold up as a Representative on Mission, as a wild card for the Scarlet Pimpernel scenario.  He comes with the roll of paper clutched in his left hand, here undoubtedly representing a blank death warrant.


A Representative on Mission

That, then, is where the expansion starts, with five reasonable combat units (National Guards, regulars, and light cavalry for the French, infantry and cuirassiers for the Austrians) for AGW, a number of cameo roles, and some left-over cavalry to expand into six man units.


Friday, May 31, 2019

NQSYW: Field Maneuvers at the Weishaus Tavern

King Rupert had noted the the recent performance of the army of Schoeffen-Buschhagen on the field had been, to say the least, uninspiring.  While troops deployed against Rosmark had some success in le petit guerre, stopping a vital convoy of supplies for the Rosish forces, and had successfully delayed the advancing Rosish by destroying the bridge at Sittangbad (though at fearful cost),  attempts to counterattack had not been successful.  Recalling reports of a session  of field training maneuvers which had been held by the initiative of a group of Allied colonels some time previously, the King and the Prince-Palatine of Wachovia agreed that another such exercise should be conducted.

Adjudication Team meeting before the maneuvers


The field of action, with Monk's Hill on the left, the orchard in the left center, and the Weishaus tavern in the right center

A relatively open area near the Weishaus tavern was chosen for the action.  The Adjudicators were briefed on the rules for the day's activities, and the troops were drawn up as though for battle.

The Wachovians deployed with their gun on the far right of their line, intending to emplace it on a small hill, and both of their cavalry regiments in the relatively open ground between the Weishaus and the hill.  Three infantry battalions were tasked with seizing the Weishaus, control of which was considered to be the condition of victory.  The light infantry were poised to advance into the orchard, and a forth infantry battalion anchored the line to the left.

The Schoeffen-Bushhagen troops, approaching the field from the north, deployed with their light infantry at the edge of the wood on their left, dragoons at the road to the tavern, three infantry battalions poised to attack the orchard and angle, and a right flank guard consisting of the artillery, which intended to deploy on Monk's Hill, an infantry battalion for security, and the hussars as a flank guard.


S-B infantry advances on the angle by the orchard
The Chief Adjudicator ordered the bugles sounded to commence the action.  Eager to demonstrate their elan, the Wachovian hussars dashed across the field and attacked the King Rupert Jaegers, still drawn up by the woods in a line formation.  Despite the protests of the hussar commander, the Adjudicators ruled that the charge had failed, and that the hussars were destroyed.  The hussars cheerfully headed off to the tavern to await the end of the maneuvers, and it was later suggested that this might have been a deliberate ruse on their part to get out of the action early to begin the drinking.  The Adjudicators may have to consider this point in future maneuvers.

Wachovian hussars realizing that the drinking can begin once they have been adjudicated as casualties
With the Wachovian hussars cleared from the field, the S-B dragoons (elements of the Prince's Dragoon Guards not involved in the recent surrender at Sittangbad) spurred across the field to be met by a countercharge by the Wachovian cuirassiers. Since it was just an exercise, both sides slowed before contact and engaged in a display of horseback fencing.  The Adjudicators ruled that the S-Bs had the better of the contest, and the cuirassiers trotted off to await the end of the day, along with a few dragoons.

Cavalry clash
Meanwhile, in the center, the Schoeffen-Buschhagen infantry advanced with drums beating and flags flying.  The plan had been to take the Weishaus with a detachment of jaegers, while the line infantry cleared out the Wachovians.  In practice, this did not go as planned.  Wachovian jaegers (the Wilderin) in the orchard proved very difficult to dislodge, and the S-B infantry was slow in taking up positions along the roadside wall at the angle, which was expected to provide sufficient cover to be able to engage in a fire fight with the Wilderin.

The attack on the Angle
Out on the S-B left, another detachment of the King Rupert Jaegers was caught by a Wachovian line unit, which showed more enthusiasm for running than the Jaegers.  Perhaps this was another case of motivation during maneuvers being less than during an actual battle.  In any case, they were sent off to the tavern to await the end of the exercise.

Knowing it's only an exercise, S-B Jaegers fail to retire quickly enough
By mid-afternoon, the Wachovians were firmly in control of the Weishaus grounds.  In the center, one of the three S-B infantry battalions had been battered and was in danger of being removed from the field.
Overview

Wachovians seize the Weishaus

Situation about mid-action
The few S-B dragoons remaining in action attempted to deal with the Wachovian infantry, but despite charging them while they were reforming, were ruled defeated and out of action.  Their officers were getting thirsty, otherwise they would have undoubtedly protested this decision.
Remaining S-B dragoons attempt to break a small troop of Wachovian foot

Eventually rising losses among the S-B infantry in the center decided the action.  Compelled to withdraw, there was insufficient time to reform, organize another attack, and perhaps drive the Wachovians, also wearing down, from the Weishaus.

S-B infantry retires from the Angle
As the sun touched the horizon, the Adjudicators ordered the bugles sounded again, to signal the end of the maneuvers, and all the Allies settled down to supper, with drinks provided by King Rupert.  The Prince Palatine looked over the field at the thirsty troops, and remarked that he was pleased that his troops had won, as Wachovia could ill afford such a defeat.

The situation at the end; Wachovians hold the Weishaus as the clock runs out

The Players' view
From the players' point of view, this game was played with A Gentleman's War rules, from Howard Whitehouse and Dan Foley.  Since Norman was trying these out for the first time, we left the distinctions rules out, as suggested in the book.  In the NQSYW, our countries are always staunch allies, so we followed the fictional conceit we use for battles between the two as being field maneuvers.

While I didn't keep good notes, timestamps on the photos suggest that we started playing around 8:30 AM and finished up around 11:00, having cycled through three decks of cards.  We had agreed that breaking five units would constitute victory, or possession of the Weishaus at the end of the third deck (since Norman was up against a real world time limit and needed to get home).  As it was, we ran out the clock, although he was close to breaking a couple of my units. We had eight units per side, and the available space in the well of the game table is 3 feet by 5 feet.  Six units and perhaps one fewer terrain piece might have made for a more mobile game, but I am still getting a feel for the rules.  Nevertheless, I was generally very pleased with how much it felt like a larger battle.  Norman noted that he wouldn't want to give up the grand sweep of the Charge! rules which we usually use with these figures.  While I agree, we also would have been hard pressed to put a Charge! game on in this 3x5 space.  I intend to post a fuller review of the rules soon.


Sunday, May 26, 2019

Huzzah 2019 AAR

It has taken me a week to get to my Huzzah report.  Ross Macfarlane has, as usual, written circles around me and gotten all of his Huzzah material posted already, although it might be noted that he has the advantage of being retired. For those not already familiar with Huzzah, it is an excellent local convention run each May by the Maine Historical Wargamers (MHW) in Portland, and has the additional special advantage of being about halfway between my house in Delaware and Ross's house in Nova Scotia.

In preparing for this year's Huzzah, Ross and I had agreed that we would field games using our Not Quite Seven Years War collections.  Mine hadn't been out in a year or so, at least until we did the remote playtest of the Ambush scenario a few weeks ago.  Following the playtest, we agreed on the force levels we would use at Huzzah.  I brought two 24-man infantry units, 2 12-man infantry units, 2 12-man cavalry units, a 12-man sapper unit, and a couple of guns, plus some command figures.  Two 6-liter boxes have been calculated to be the most that will fit under the seat on most commercial flights, and that all fit, once I selected the cavalry from those who were't waving swords in the air.

Infantry ready to go

Cavalry, with a few needed taller figures cushioned in handkerchiefs


Armies on the go; 2 6-liter Really Useful Boxes
Getting the troops through security was interesting, as always.  I could see by the look on the x-ray operator's face that she was trying to decide what to ask, so I just jumped in and said that it was a box of toy soldiers.


I met fellow HAWK Duncan Adams at the airport; we hadn't planned to travel together, but the limited air schedule from Baltimore to Portland meant that I wasn't completely surprised to see him.  We had a limited HAWKs team this year, just four of us altogether.

We arrived at the hotel in good time, before the MHW people had finished setting up registration.  Registration was the one element of the convention that didn't go as well as the MHW had probably hoped.  It was entirely my own fault that I forgot to register in advance, but the computer system they were using this year turned out, as they discovered, to be unable to register people at the door.  Handing them cash in return for a handwritten badge was not a problem, but it did have the knock-on effect of leaving me unable to register for any games, since I wasn't in the computer system.  They said that they would return the paper game registration books next year, or perhaps they will have the computer system worked out.  I will also make sure that I am properly registered...

Ross arrived within an hour, and we decided to set up a test game of A Gentleman's War in the afternoon session.  I don't have much to add to Ross's account of the battle.

A couple of turns in; initiative cards and rules prominently displayed

We were pleased with how the rules played, particularly as a two-player game.  I was a little slow in picking up the implications of the initiative system, and Ross was able to get better use from his artillery.  So, the forces of Schoeffen-Buschhagen were eventually compelled to retreat, leaving the village in the hands of the Rosish.

After supper, we set up the second game.  This was the ambush scenario (#30) from C.S. Grant's Scenarios for Wargames, using Ross's home rules, "With MacDuff to the Frontier".

S-B Adelmann Regiment advances to its blocking position

S-B von Nordhafen Regiment also moving to block

Wachovian Hussars facing down the Rosish cavalry

As Ross has noted, the Schoeffen-Buschhagen ambushing force put most of its strength into a blocking effort along the road, and left the light infantry off to their left to harass the convoy, and, as it turned out, lure a significant part of the convoy escort into chasing them into the rough ground away from the road and the wagons.  The S-Bs managed to win the game by not losing their patience .

I took the Saturday morning session off, to do some shopping and get my Gencon event wishlist in order, because the Sunday of Huzzah was also the opening of the Gencon events registration.  I was fairly restrained; although I did pick up a nice clean copy of  the Avalon Hill edition of Kingmaker and a couple of figures for my Dark Ages/Saga collection.

On Saturday afternoon we set up the second game we were running, the Sittangbad scenario from Charge!.  Ross and I occasionally slipped and referred to our usual forces as "my side" while gamemastering.  As it was, what felt like an endless array of "his" forces came rolling across the table at "mine", which were attempting to evacuate supplies and mine a bridge.  Excellent work by the King Rupert Jaegers in holding the farther town slowed down the advancing Rosish tide for just long enough to mine the bridge.  Rosish grenadiers had just assaulted "my" troops guarding the bridge and were in a position to clear the engineers if they drew the next initiative card.

Starting view of the table, prior to Rosish entry; key bridge at the upper left
S-B forces form a line to hold, following an initial cavalry melee

Just in the nick of time; the general and the engineers cross the bridge to safety moments before the explosion

Happily for S-B, the card fell for "us", and the general and the engineers made it to safety as the bridge was demolished in the explosion.  Unhappily, a dragoon regiment, the remaining grenadiers guarding the approaches to the bridge, and half of the engineers were left on the wrong side and compelled to surrender.  It is to be hoped that a prisoner exchange will occur soon.

Jeff Bickel's C&C Ancients Gaugamela game

I spent the evening session commanding the Persians against Alexander in a Command and Colors Ancients game run by Nova Scotian Jeff Bickel.  As expected, Alex was hard to beat, and we didn't...

We tried one more session of A Gentleman's War on Sunday morning before we departed.  I got busy running the game, and didn't end up taking more than one picture.

Rosmark artillery takes a toll of S-B Grenadiers
As noted in Ross's report, he used a fire advantage carefully, and the S-B infantry attack was repulsed without too much difficulty.

We talked about next year's convention over lunch; the current notion is that we will dust off and expand the French Revolution collection for the game(s).

Meisterzinn pieces for a new 1793 unit

Checking available Meisterzinn head castings against Funcken illustrations

More on that to follow...


Sunday, May 5, 2019

Battle of the Crossroads


I had the opportunity yesterday to break out the 1/72 scale plastic Portable Fantasy Campaign figure to resolve a pending battle in my solo Northlands campaign.  I’m still evolving the campaign resolution mechanics, but I had reached a point in March where I had a full-scale battle (using Hordes of the Things), but it’s taken a few weeks to finally get it done.  It’s terrible when you can’t find the opponent for a solo game...

The Cold Islanders (loosely Vikings) had invaded the Kingdom of Darmis (loosely medieval French), but a skirmish previously reported (last May) and a lot of parleys were the only actions up to now.  I may have to tweak the battle generation system, so that the amount of record-keeping per battle is a little more favorable.  However, with a battle in hand, I decided to take a suggestion from Ross and try a scenario battle, randomly chosen from Neil Thomas’s One Hour Wargames book. I ended up with Scenario 11, “Surprise Attack”, based on Quatre Bras in 1815.  I randomly assigned Darmis the role of the attacker, which was appropriate since they had been trying to force a battle in the strategic decision system.
The Northlands Map, Rienne toward upper left

This left the Cold Islanders split up, with part of their force on the table and two parts arriving later.  I elected to go with the 15 turn time limit, but, as you’ll see, that didn’t end up being the decisive factor.  The Cold Islander had, in Hordes terms, a Hero-General, 2 Blades, 4 Warbands, and 2 Shooters, and Darmis had 4 knights (including the general), 3 Blades, 2 Shooters, and a Wizard.


Battle drawing, showing the opening phases

From the Northland Chronicle, as maintained at the University in Darmis:


In the seventh month of that year, King Rollant of Darmis, having failed to secure the removal of the Cold Islanders from the lands of the Count of Rienne by negotiation, resolved to attack the encampment of the barbarians.  Perhaps muddled by fine wines looted from the territory around Rienne, and lulled by the exchange of parleys, Eric Stronghand, leader of the Cold Islands army, was caught off guard by the King’s advance.

     Nevertheless, the Cold Islanders drew up their shield wall, and waited as the king and his knights formed their battle array.  Impatient with this maneuvering, the captain finally advanced to within bowshot of the knights, and the battle began in earnest.

     King rolland had secured the services of Cassara, of the Blue order, a sorceress of the great university in dramas, and hoped that her powers would enable a swift victory.
Knights of Darmis deploy into a battle formation
The first part of the battle, though, was won by steel and valor, as a charge by the king and his knights scattered most of the barbarians.

Eric and his shield companions finally reached the field, and were able to gather the scattered barbarians into a second shield wall.

Cassara sent a messenger to the king to tell him that the augers were propitious for her sorcery, and the king held back to allow her to do her work.  Four times the sky darkened and the mystic energies crackled about the field, and/or times Eric Stronghand stood against the spells.  But the fourth time was enough for him, and he and his companions charged toward the dreaded sorceress.

The final charge of Eric Stronghand
In close combat, axe against spell, Cassara finally prevailed, wrapping the Cold Islander in unbreakable bands of enchantment.

With their general ensorcelled and casualties heavy, the Cold Islanders broke and fled the field, racing to protect their boats.  Well pleased with this result, King Rollant withheld his knights, not permitting them to scatter in pursuit, and bade Cassara bring Eric to his table to discuss the terms of his ransom...

So, it wasn't a bad game overall.  I wasn't sure what would happen with scenarios in Hordes, but it seemed to work reasonably well, with a caveat for starting the Cold Islanders with their general off the table, doubling all their maneuver costs initially.  In retrospect, it might have been better for the Cold Islanders to take their chances with the Sorceress, since she used most of the command pips for four turns unsuccessfully casting spells at the enemy general.  However, past experience has led me to believe that a Hero-General has little chance in the long run against a Wizard, so I went ahead to see if I could eliminate the threat.

Now it's back to the log book to consider the next set of moves, and see what sort of battle will generated.


Friday, May 3, 2019

Battle Reports


One of my personal hobby challenges this year is to try to keep more entertaining records of games played, so I have been sketching maps with colored pencils to memorialize the games.

I was getting a little behind, so I was pleased to be able to take some time today to catch up on entries for the latest two games.
The Ambush scenario from the 20th of April

Here’s the Ambush scenario as played with Ross Macfarlane on the 20th...

Ghost Archipelago game from the 27th of April

and the Ghost Archipelago campaign game from the 27th.  I may yet get a fuller battle report for that posted here, since I do have a few additional pictures.

At any rate, since I am now caught up, I can set up the solo game for my (theoretically) ongoing fantasy campaign without a sense that there’s anything else I should be doing.