Showing posts with label St. Michel. Show all posts

Thursday, April 1, 2010

Retreat from Rosmark: Cold Wars 2010 St Michel Scenario 5


Our final game of the St Michel campaign was scheduled for 6:00pm Saturday.  That gave us a brief opportunity to rest after we reset the table.  By that point in the convention, I must admit that I was glad not to have to redo the scenery.  We did a pretty good job of keeping things organized as we went along.  Nevertheless, the setup table we were using was looking a little unsightly as we launched into this last game. 


Once the defenders were laid out, we helped the players along by adopting a reasonable order of march for the retreating Pragmatic Army.  Had we had a continuous player presence throughout, we would have asked them to organize this after Scenario 3, without knowing whether the next scenario would involve, say, an attack on the rear guard of the main column.  As it was, we briefed the order to the Pragmatic players at the beginning of the fifth game, and they did not ask to rearrange anything.  We launched into the rules explanation for the fifth time, keeping it short in deference to my croaking voice. 


While the players may not look too excited here, I think that was a result of the general energy level at the end of the convention.  They certainly stood up and played with enthusiasm when they had the opportunity.
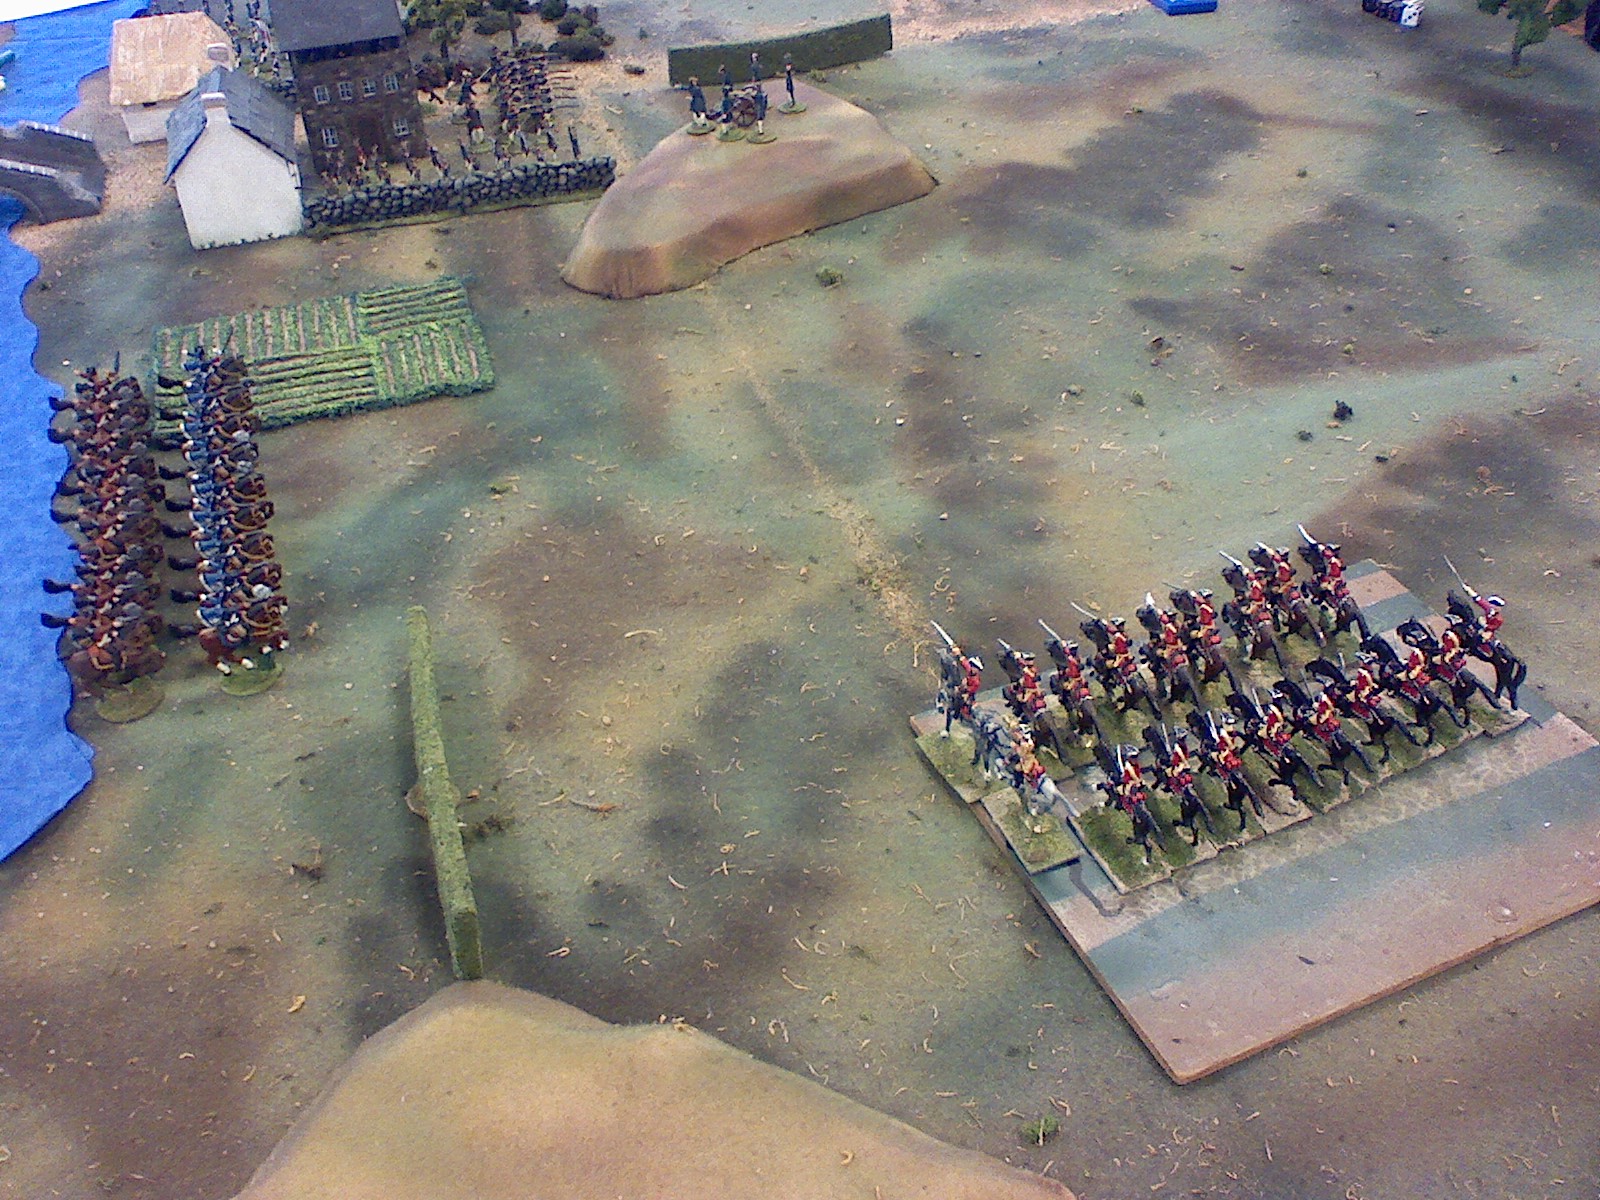
Ross has already laid out the structure of the battle on his blog (Battle Game of the Month), so I won’t repeat it in detail.  The Northern Alliance forces remaining on the field after scenario 4 had been regrouped and deployed behind the main road, and the game began as the head of the retreating column appeared on the table, led by the Stanzbach-Anwatsch Dragoons in gray.  They spurred forward immediately to engage the Fitzjames Horse, ready for another action following their destruction of the S-B and Wachovian hussars during the counterattack in the previous scenario. 


As the cavalry fight developed, the Northern Alliance pursuit force began to appear on the table, and squadron after squadron was drawn into a furball which lasted the remainder of the game. 


While expensive in terms of casualties, this action, the largest cavalry fight seen in the Not Quite Seven Years War to date, covered the flank of the retreating column for long enough to permit the leading infantry regiments to deploy opposing the Rosmark infantry.  With that covering force in place, and gradually pressing back the outnumbered Rosians, the rest of the column pressed on for the bridge and the sanctuary of S-B territory.


The remaining Schoeffen-Buschhagen infantry, who started the day occupying the much-disputed thatched cottage, supported by the converged Pragmatic grenadiers who advanced rapidly for their position near the head of the column, resisted a final Rosian attempt to seize the bridge approaches.  They then counterattacked, clearing the stone house of Rosians, and thereby firmly opening the path to the bridge.  Meanwhile, Wachovian and Stanzbach-Anwatsch light infantry occupied the orchard, and opened a galling fire on the Rosian defenders, which contributed to the successful assault on the stone house.

With the retreat route secured,  the game (and the raid) was pretty much over.  Despite the valor of the Pragmatic forces and a tally of tactical successes, the failure to force the defenses of St Michel in the third scenario meant that the raid was unsuccessful, and it was a much downcast army that returned to S-B territory to prepare for the next campaign.
From the gamemaster’s chair, though, I was very pleased with the series of games.  I’m grateful to all the players we had over the weekend for their willingness to play along with the campaign theme even when they didn’t have to live with the consequences of their actions, and I’d certainly be willing to undertake this sort of thing again.  It’s always nice to see all of the work that we put into the troops out on display in its proper environment, and I went off ready to do some more painting, reading and casting...

Thursday, March 25, 2010

The Pragmatic Defense of St Stephen (Raid on St Michel, Scenario 4)

From a gamemaster's point of view, we finished a satisfactory game 3 on Friday night, did the paperwork necessary to record casualties, and then packed things into boxes to await our attention when we were, we hoped, better rested in the morning.  With the aid of Ross's handy camera and my laptop, we consulted photos from Thursday night to reset the border town of St Stephen as closely as possible to the previous game there.  While we tried to get things exactly like they were, the key was going to be to ensure that the terrain did not accidentally shift between scenarios 4 and 5.  This was made easy for us by the HAWKs room scheduler, who ensured that we had continuous use of the table on Saturday.  Scenario 4 was also a nice one for a Saturday morning, involving few enough troops that deploying them was not a significant time issue.  This allowed us to eat a leisurely breakfast, a significant factor by that point in the convention.

View of the town from the left


As usual, we had no idea how many players would actually show up for this, so the Student Prince was invited to lay out a defensive position without looking at the scenario book to see what the enemy's expect axis of advance might be. The Adelmann regiment was deployed to the left of the town, as viewed from the SB side of the river.  The von Nordhafens deployed on the right side, with the artillery, and the Wachovian and SB hussars (1st squadrons of their notionally extended regiments) deployed to the far right.

Von Nordhafen regiment defending the town

As it turned out, we had three players show up for this scenario, so the Student Prince volunteered to take a role to make a nice even four.  He was assigned to the defenders, thinking it fairest to compel him to live with the consequences of his defensive set-up.  After a quick council of war, he and the other Pragmatic player agree that they would leave things as they were, and that the Prince would command the left side of the town.  He is shy of commanding the von Nordhafen regiment, which has the reputation of having suffered more disasters than any other unit in the S-B army, several while under the authority of the Prince...

Enemy in Sight!

Events showed the Pragmatic commander to have been foresighted.  As the game opened in the late afternoon of the game day, a regiment of Rosish dragoons was sighted approaching the town.  The Wachovians missed few opportunities to engage during the campaign, and this was no exception.  The order was given to charge, to protect the lone gun on the Pragmatic side.  It was considered likely that reducing the strength of the oncoming Rosish infantry by artillery fire was the only hope the Pragmatic troops had of holding the town, and it was therefore vital to keep the gun from being overrun immediately.  A ferocious two turn melee resulted, which ended with the Hussars being eliminated as a fighting force, but taking the dragoons out of action for long enough that the action had moved to the streets of the town by the time they rallied, and they played no further part in the battle.

Hasty redeployment

As soon as it became clear that the enemy was concentrated on the right side of the town, the defenders  quickly redeployed the Adelmann regiment.

I should note as a gamemaster that Ross and I were a little uncertain when we started this scenario just how long it should be to provide the appropriate level of challenge to the Rosish player.  After consider the table size and the difference in movement rates between The War Game and Charge!, we finally agreed on a ten turn limit.

Adelmann Regiment meets the first attack

Once the opening cavalry action was concluded, the remainder of the battle consisted of the attack of the Rosish infantry.  From the Pragmatic point of view, the Adelmann regiment was engaged in a series of desperate melees on the right flank around the approaches to the bridge, and the von Nordhafen regiment was engaged in a firefight on the left.  On the right, successive Rosish charges brought about most of the few massed infantry melees we resolved in accordance with Charge! rules all weekend, and the constricted area kept the attackers numerical superiority from weighing too heavily on the defenders in any one melee, though the defenders were worn down as the attacks went on.  

Rosish colonel exhorting his men to try one more time

On the left on the position, superior numbers and the eventual deployment of a battery of artillery made the situation very hot for the von Nordhafen regiment.  The S-B gun attempted to get off one shot too many and was overrun.
Chargers reach the gun position

However, fire from the infantry ensconced in a covered position behind the hedgerow proved to be too much for the already battered Rosish regiment, and they withdrew, unfortunately not without the gun.  As a second line was coming up behind them, the situation remained grim, and the defenders began to doubt that the sun would set on a Pragmatically-held village.

A final push by the attackers

As the sun set (or turn 10 ended, depending on your point of view), the von Nordhafen regiment was reduced below strength and compelled to retire.  Their standard was taken, and they fell back from their position in the stone house and the white house.  Troops of the Adelmann regiment were gamely rallying after the series of assaults, and they continued to hold the thatched house and the adjacent orchard, which would feature significantly in the next action...

Elevated view around turn 8

The game was judged a draw, with the Northern Alliance in control of the majority of the town, but not in control of the bridge.  Interestingly, this is the "book" situation when scenario 5 is to be played as a stand-alone situation.  As a gamemaster, I found this to be a tense and exciting scenario, with a number of incidents which could have altered the end situation considerably. (The slightly late timing of the withdrawal of the SB gun, for example...) This was a reminder that the satisfaction produced by a game is not necessarily in proportion to the number of troops involved.  This game could have been played on my 5x6 home table, so I really ought to work on a few limited scenarios to keep me interested until the next major gathering.

Saturday, March 20, 2010

More on St. Michel


I took the opportunity to raid my son's archives for a few of his shots from the St. Michel games.  Here we step back from the imaginary world for a moment, and find co-gamemaster Ross refreshing his memory on some aspect of the Charge! rules (here the 1986 Athena reprint that I carry to conventions) prior to the start of Scenario 3, the Battle of St. Michel.

Scenario 3, for reasons that are not clear to me, since I thought that we started at a sensible time (6pm on Friday), was massively undersubscribed.  We press-ganged my sons, my older son's college roommate, and a spare Hawk, also of college age,  to actually play the scenario.  This was the one scenario where Ross and I dropped our mask of impartiality and commanded some of our own troops, though we chose to face each other on the quiet flank of the action, leaving the meat of the fight to the younger generation.

Ross will cover this "in role", but my player-level observation on Charge! is that a major infantry assault will not reach the target without losing a screen of some sort, and if you're not prepared for that, it would be better not to make the assault in the first place. The advancing Pragmatic infantry in the center of the table suffered severely under Alliance artillery fire, so much so that we never actually were able to assault the town.  Had we started with a major cavalry advance, the infantry might have been able to advance within musket range of the objective in a fit condition for the assault.  As it was, the Alliance delivered the bold cavalry charge at just the right moment, not us, and a regiment of Freedonian infantry crumpled under a charge by the Yellow Hussars, undoubtedly itching for revenge after their rough handling at the hands of the S-B dragoons some days previously.  It only took six or seven turns to realize that we would have to withdraw or risk having the entire army cut to pieces in the follow-on scenarios.
Here the S-B Prince's Dragoon Guards, deployed at full regimental strength for the first time for this raid,  have nothing to do but stand around looking pretty, trapped as they are behind all the infantry to their front in the center of the table.

On St. Michel


I'll let Ross tell the story as proper battle reports on his Battle Game of the Month blog; I'm lucky that he has a way with words in that respect, although it does mean that I am going to lose the propaganda war every time...

My son had the camera, so the only pictures I got were from my cell phone.  The lead shot here is the Pragmatic Army drawn up for the attack on St. Michel (scenario three), showing the rather wide variety of uniforms.  It's a good thing there are no rules for friendly fire incidents in this game, as the Pragmatics must have had quite a time with IFF issues.

The second shot is actually from the Sawyer's Farm/Sawmill Village pre-convention game, showing my sole S-B general, plus his newly completed personal standard and an aide-de-camp with a rolled order galloping off...I was glad of the opportunity to paint a few figures as the convention loomed, and have been working on preparing a few things for painting this week.