Wednesday, June 26, 2024

Casting with Schneider Molds for a 19th Century Project

 Through a fortuitous alignment in work and holiday schedules I was able to get five days off at the cost of one vacation day last week.  Unfortunately for my plan of doing a couple of long bike rides, we were under a “heat dome” with record-setting temperatures, making that inadvisable. 

What I did instead was to set up the casting gear, as molds (unlike bicyclists) are benefited by extreme heat.


Since the last time I cast, I had acquired one of the remaining molds to make this project practical, by my rather whimsical standards, of course: a mold making a set of three Prussian/German artillerymen in the ~40mm scale.


I have two molds for cannon, a Schneider 74, and a WGW 5926. I have had little luck in getting a complete casting out of the Schneider mold, so I hoped that the hot day would do the trick.


As it was, I decided this was close enough and I would patch the missing spokes with greenstuff or hide them with some foliage.

I was a little surprised to pour a 95% complete (i.e. repairable) example of the WGW 5926 just as I was stopping for lunch one of the days.


I even managed to make some cavalry, although they will require some weapons repairs.


These are from Schneider molds 1 and 3, I believe.  

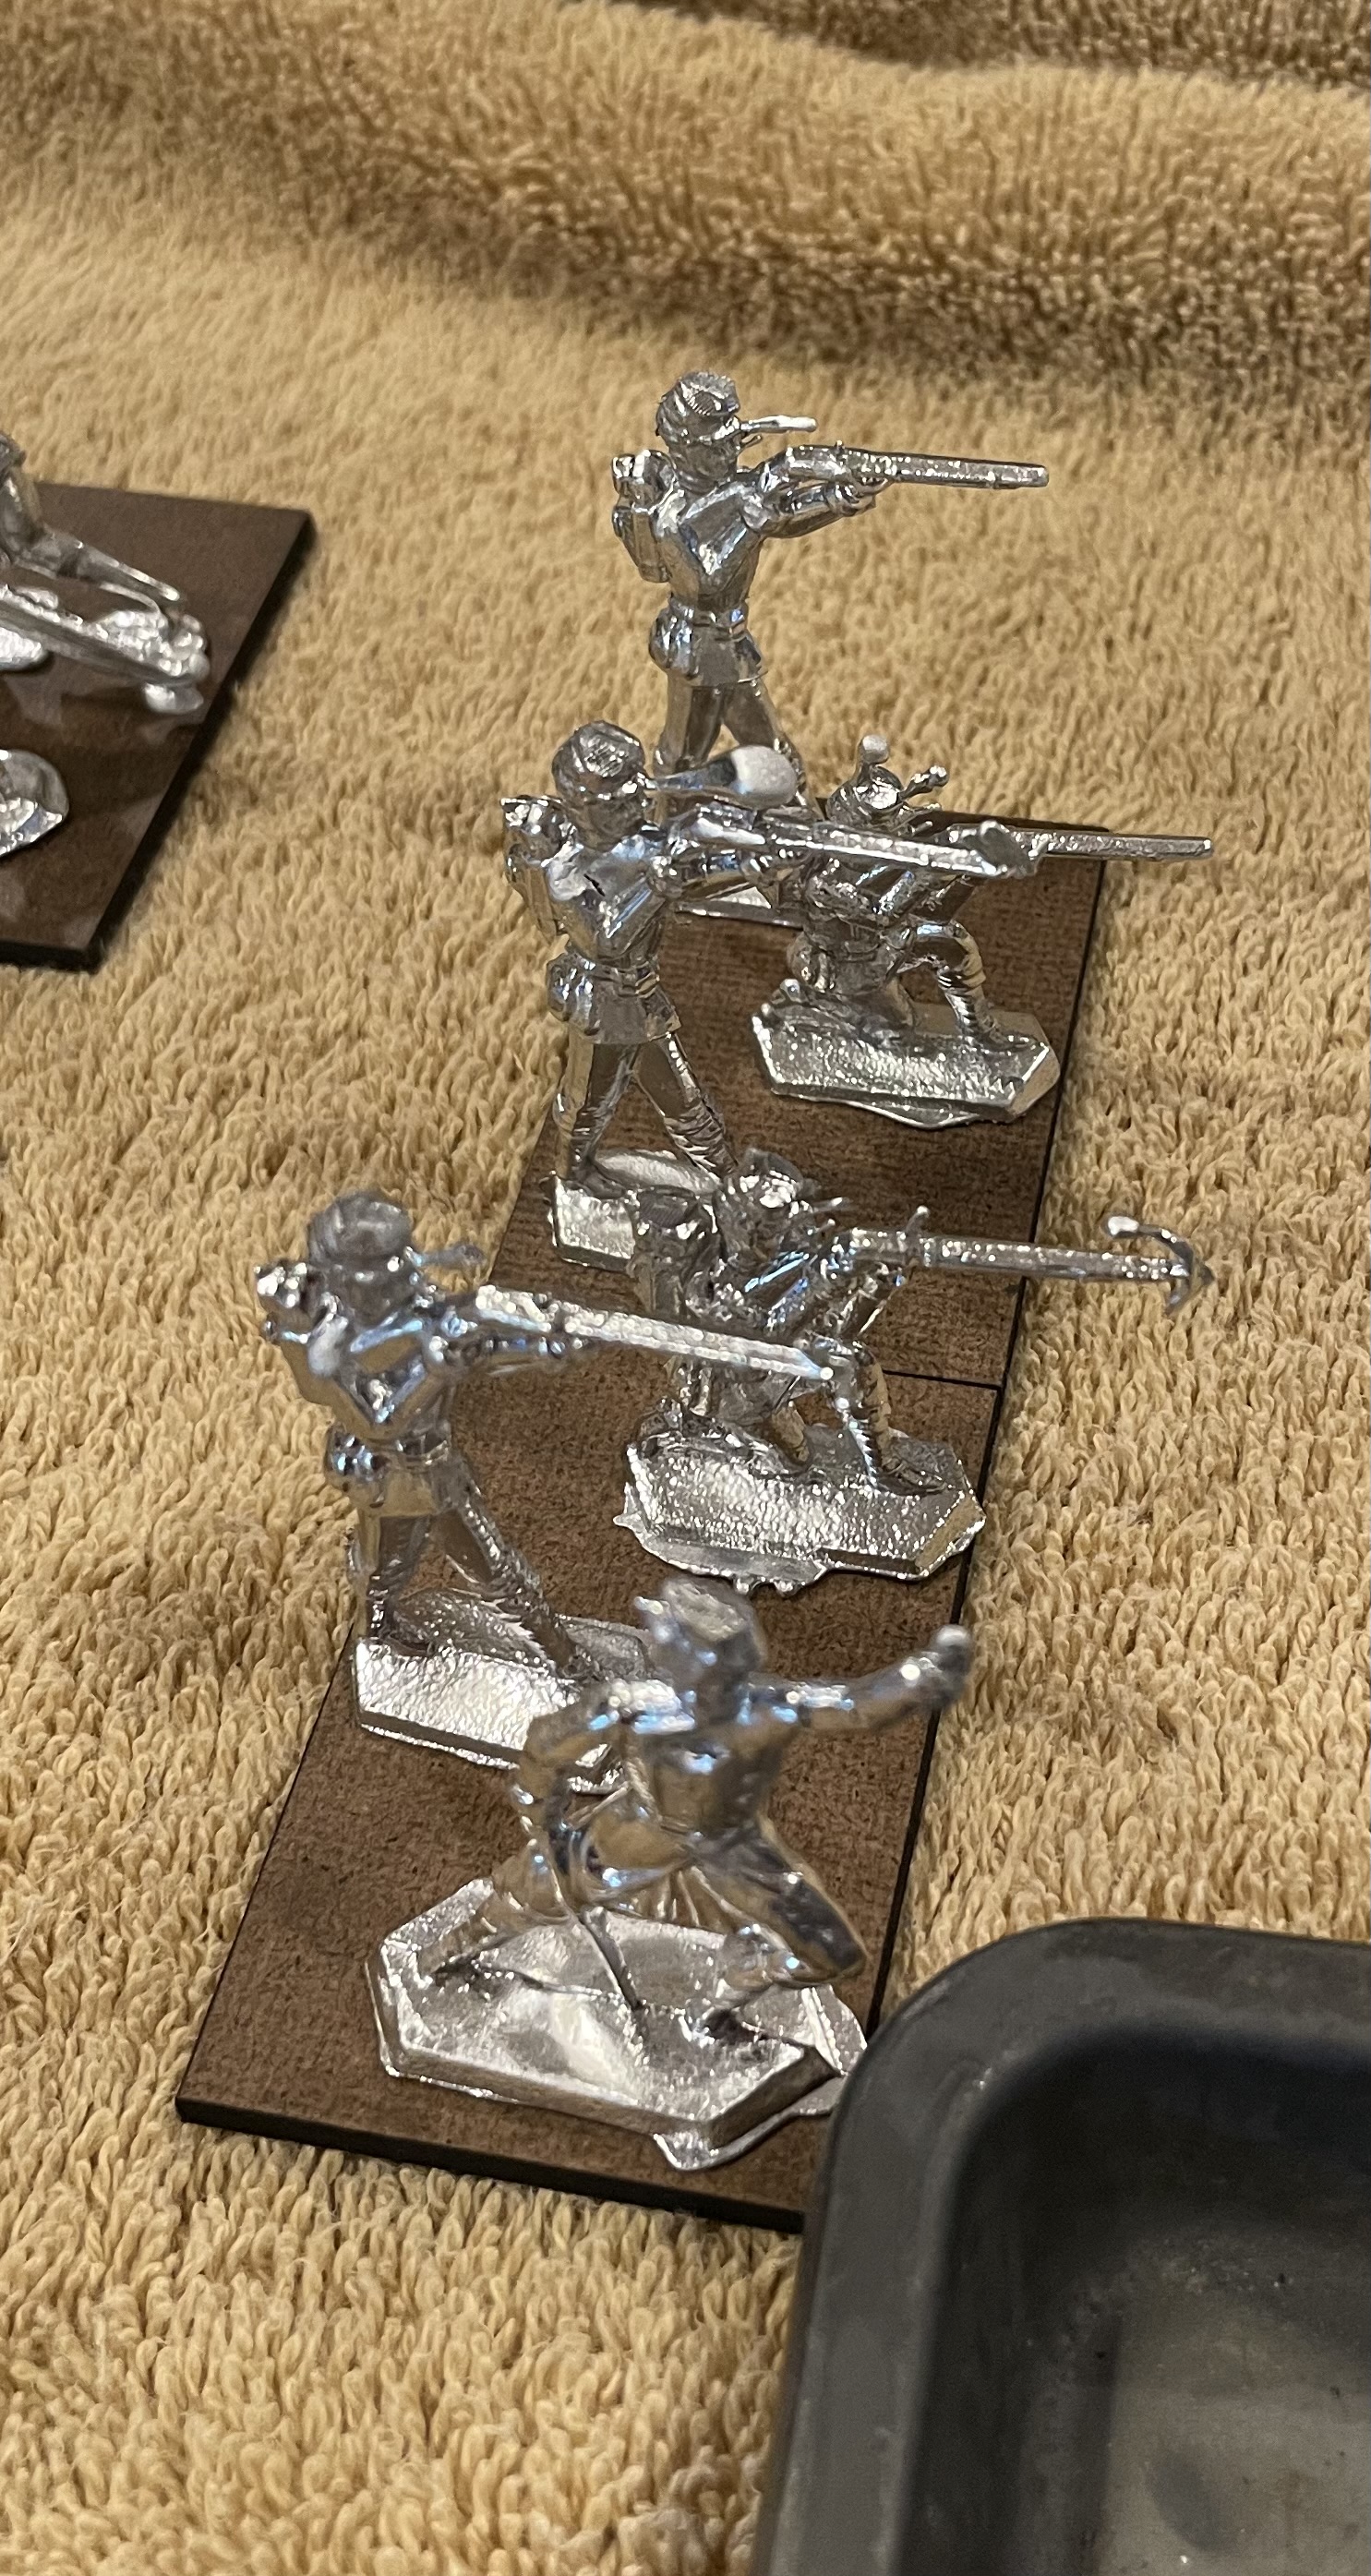
The infantry was generally casting well, particularly the standing and kneeling firing pairs, although some marching Prussians turned out to be rather fussy.  


With some figures cast in a previous experiment, three afternoons spent at this allowed me to cast enough figures for a French(ish) army and a Prussian(ish) army for One Hour Wargames, less one cavalry unit for each side. As can be seen in the basing mock-up picutres above, my plan is for each army to consist of 4 infantry units (each of 6 figures on 2 60x40mm bases), 2 skirmisher units (each of 4 figures on 2 60x60mm bases), 2 cavalry units (one only right now, consisting of 4 figures on 2 60x60mm bases),  and 2 artillery units (each of a cannon and 3 crew on a 60x80mm base). 

The Schneider mold series has a few “dramatic” figures.  I don’t yet know what I’ll do with the “falling wounded” or “clubbing with rifle” poses, for example.


Schneider had an extensive range of molds. (A link to their catalog can be found here.) I have some scenery molds, so while I was casting I decided to make a few more trees and try a sub-scale house mold I have.


As the fates will have it, the house proved remarkably easy to cast; I got three in three pours.  The tree mold is also very reliable.  I’m thinking for this project I’ll mount the trees on round bases and scatter a few over the cloth forest bases for appearance.  

My elder son gifted me with a grandchild last March, so we have been idly considering the proper age for involvement with our hobby.  Before that time, though, perhaps the Schneider molds could be used to produce a more pacific play set:


This is an assortment of Schneider farm animals, farm people, trees, and one of the houses (off in the distance with forced perspective 😆). The fence section is one of the cavities in the mold with the cow and the farm woman.  I also have a selection of Schneider zoo/wild animal molds.  I’d like to give them a try next time.  With the recent Not Quite Seven Years War games inspiring some work, I will probably need to haul out the gear sometime soon and fill out some partial units, so I don’t think it will too long before the next session.


Monday, June 24, 2024

The Perfect is the Enemy of the Good, or Two Recent NQSYW Battles

 This year continues to be a slow year for getting much done with the wargaming hobby.  I have not been painting much, and, at almost halfway through the year, I have a mere 11 games in the logbook.  That said, the two most recent games were both Not Quite Seven Years War Charge! games.  I have been delaying on getting them written up as proper fictionalized battle reports, and have decided this morning that something written would be better than the perfect report never set down.

The Bridge at Gehoelzkirche

The HAWKs hosted a game day on the 8th of June, and I volunteered to run a Not Quite Seven Years War game since I hadn’t seen the troops on the table in w while. Additionally, Ross Macfarlane  had sent me a contingent of troops from Rosmark during one of his bouts of downsizing, over a year ago, and they hadn’t yet been out.  I had a video chat with Ross to make sure I knew who was who, and arranged with Chris Palmer to borrow the North Polenburgers. I decided that the scenario would be “The Vital Bridgehead”  from C.S. Grant and Stuart Asquith’s Scenarios for All Ages.   This is a slight adaptation of “Sittangbad”, the example scenario from Charge!. I was a little startled to find that I had enough troops on hand to deploy the scenario using full regiments (~60 foot or 30 horse).  I set it up on a 6x12 table, and didn’t quite work out the movement rates vis-a-vis table size correctly.


Here in the foreground can be seen the small town of Gehoelzkirche.  As the scenario fell out, it was defended by a mixed force of the Northern Alliance (Rosmark and North Polenburg) who were falling back in the face of a superior force after a failed raid into Schoeffen-Buschhagen.  As they reach the town, they discover it is choekd with vital supplies which need to be evacuated across the bridge before the brdige can be destroyed.  In the farther distance, another small village is available to serve as a defensive strongpoint, and was garrisoned by a battalion of Rosish Pandours (light infantry for this game).  Two regiments of infantry and some supporting elements are in the open area between the two towns, and one regiment of infantry protected Gehoelkirche and the bridge.


The attackers, the Pragmatic Coalition, with four infantry regiments, three cavalry regiments, and various supporting troops needed to capture the bridge and trap the Alliance force on the wrong (west) side of the river if possible.  


Now, as referee I made a mistake in not allowing the attackers enough time to potentially get infantry across the table to interfere with the evacuation of the town and subsequent withdrawal of the troops.  It’s possible that the cavalry, if boldly handled and indifferent to the casualties, could have forced their way through the defenders between the towns, but this wasn’t put to the test.  The attackers spent a great deal of time attempting to force the Pandours out of the smaller town before finally compelling the Pandours to surrender.  As a delaying tactic, it worked brilliantly.  


With time to evacuate the supplies, the Alliance forces began to cross the bridge (led here by two squadrons of Rosish carabiniers) back into the safety of West Rosmark.  Overall, I wasn’t pleased with my lapse in scenario adaptation, but, other than that it was a fun and visually spectacular game.  I later calculated that we had about 630 home cast 40mm semi-flat figures on the table, which did contribute to some traffic james along the way. Perhaps I should paint up some Schoeffen-Buschhage provosts to direct traffic…

Encounter at Gaithersburg

Just a week later, on the 16th of June, I took the troops on the road to visit my elder son’s house.  For Father’s Day, we set up another Charge! game, this time using scenario #2, “Threat to the Flank” from Scenarios for All Ages.  Knowing that we would be using a 5x6 foot table, and having the recent time and traffic troubles in my mind, I decided that we would scale this down, and deploy Charge! companies and squadrons for the units, rather than regiments.

After the failure to trap the raiders at Gehoelzkirche, the Pragmatic Coalition was attempting to gain some advantage by continuing to pursue the retreating Alliance forces.  The Alliance chose to make a stand at Gaithersburg.


I took the part of the Northern Alliance, defending some high ground behind a shallow river.  The Pragmatic Coalition forces (mostly provided by Norman’s Wachovians and William’s Wiegenburgers) had sent a flanking force to their right to use a bridge further up the river to outflank the defenders.

They had a quick conference and decided to reject the scenario’s pre-set outflanking plan in favor of a frontal attack across the river and up the hill.  As it happended, the Wachovian regiment in the lead was shot up pretty throughly by the defenders, but the Wiegenburgers behind them were mostly screened, and successfully took the hill on the second assault.


What then amounted to a diversionary cavalry action at the bridge had no significant effect on the outcome of the battle.  


Overall, it was a fun (albeit short) game.  We probably spent more time deploying and packing away all of the indivisually based figures than we spent actually playing.  However, we had reservations for an early dinner, so everyone accepted the schedule constraints. 

The Future

At this point I had already submitted a notice to the organizers of Barrage (27-28 September) that I would like to put on a big Charge game, so we’ll be looking to fill a 6x20 foot table.  Various HAWKs are dusting off or expanding contingents that haven’t seen battle in years.  Perhaps we’ll see you there …